Prerequisites needed to add Microsoft 365 Organization
To add Microsoft 365 Organization(s) on the BDRCloud Server, you can follow the below steps:
Using Azure AD Application (Automatic or Manual)
In this method, BDRSuite for Microsoft 365 uses an Azure AD application to connect your Microsoft 365 Organizations for Backup and Recovery.
- Create a new application in Azure Active Directory and generate the Application ID and Application Password.
- Then, enable the specified Microsoft Graph API permissions which are required for performing Microsoft 365 Backup & Recovery.
Note: Enable SharePoint REST API permissions only if you want to backup & restore the SharePoint – List Attachments and Site Pages.
Generate Application ID
Sign in to the Azure Portal using your Microsoft admin account.

As you login to the your Microsoft Azure Portal, a permission request page will pop up for confirmation which is as follows;
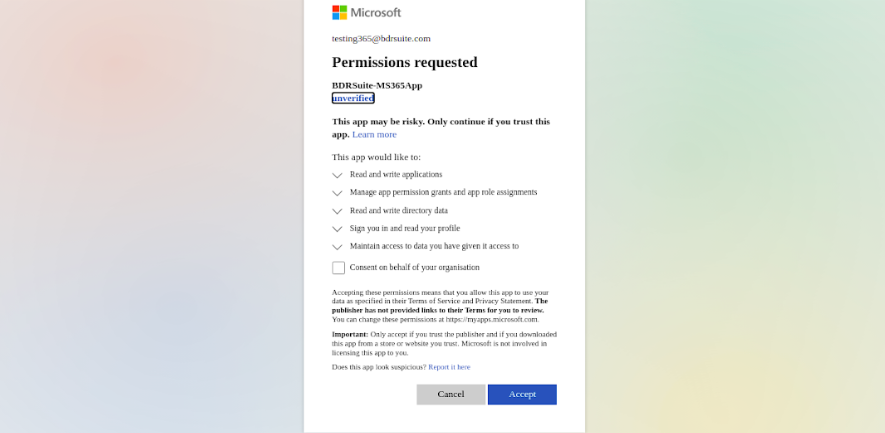
We recommend you to select the check box for consent on behalf of your organization and proceed by clicking on Accept.
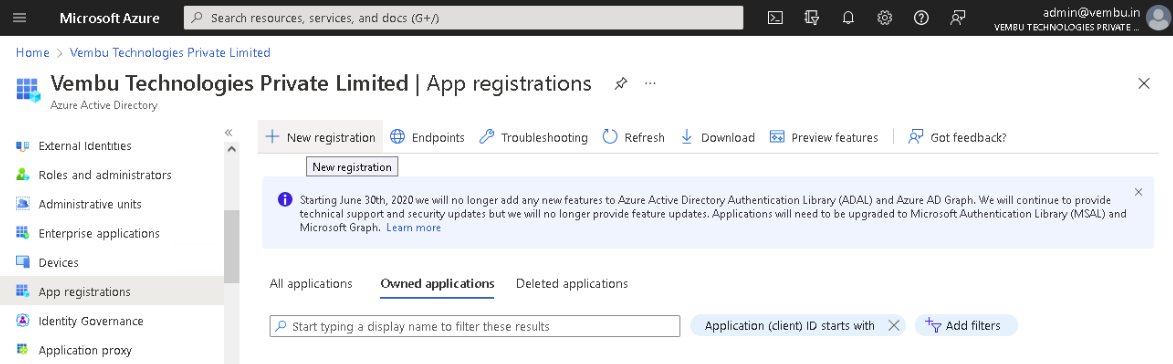
On the following page that will open search and locate the Azure Active Directory. On the Active Directory page, select App registrations under Manage on the left pane and click on New registration.
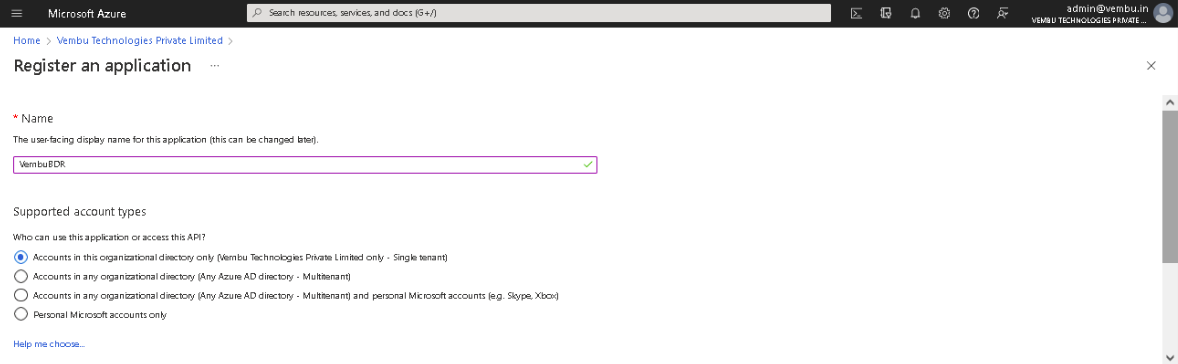
Then ‘Register an application’ page will appear and enter the following details to register your application.
- Name – Enter a display name for the application
- Supported account types – Choose the option “Accounts in this organizational directory only”
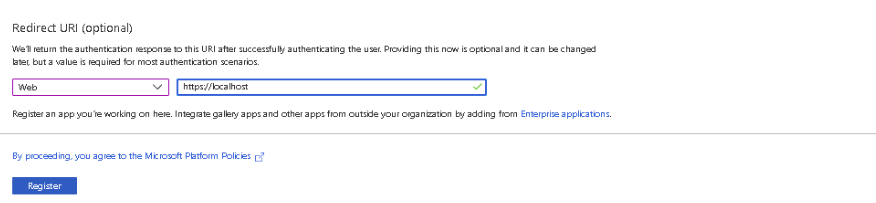
- Redirect URI – Select Web for the type of application and enter the redirect URI as https://localhost

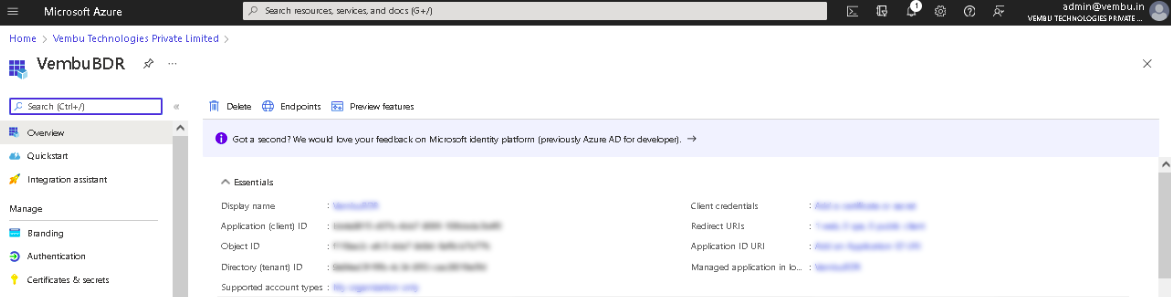
Finally, click on the Register button. The Azure AD assigns a unique Application (client) ID, which is shown on the Overview page to which you will be redirected.
Generate Application Password
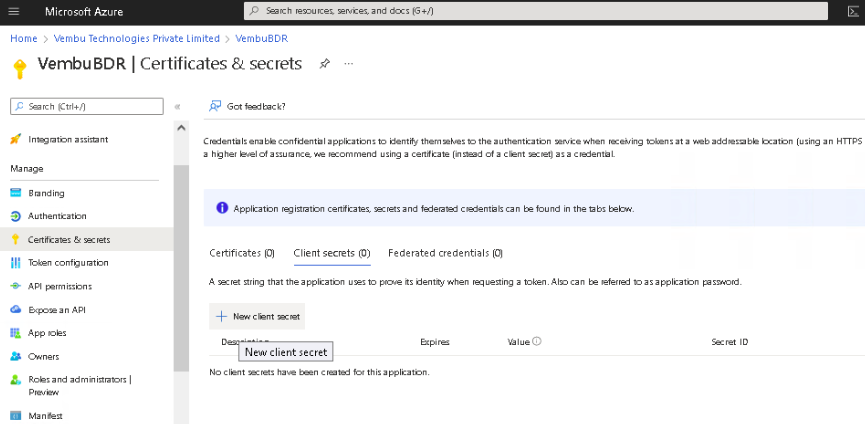
- Select Certificates & secrets under Manage on the left pane.
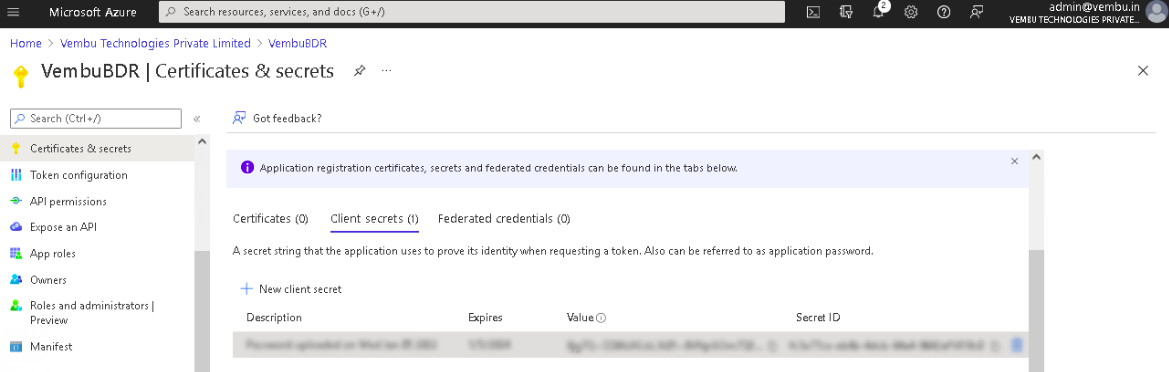
- Click on New client secret which opens a separate section: Add a client secret. On this page, choose 24 months from the Expires option and click Add. This will generate and display the application password (under the ‘Value’ column).
Note:
Make sure you copy the application password (Value) as the portal will display it only once. (You can use the copy to clipboard icon to copy the password). Once the generated application password has expired, create a new client secret and update it on the BDR Backup Server. If the expired password is not updated, backups will fail.
Add Permissions for Microsoft Graph API
Adding Permissions to the Microsoft Graph API can be done using any of the following options:
- OPTION 1 – Using JSON to Add Permissions
- OPTION 2 – Add Permissions Individually
These permissions are needed to access Microsoft 365 Mails, Contacts, Calendars, OneDrive, Groups, SharePoint, and Teams data.
OPTION 1 – Using JSON to Add Permissions
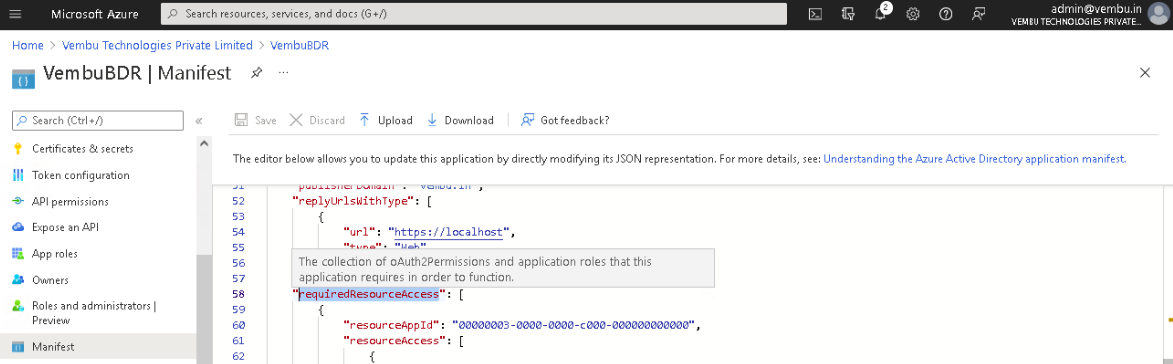
Select Manifest option under Manage on the left pane and the JSON corresponding to the created application will be shown on the right side.
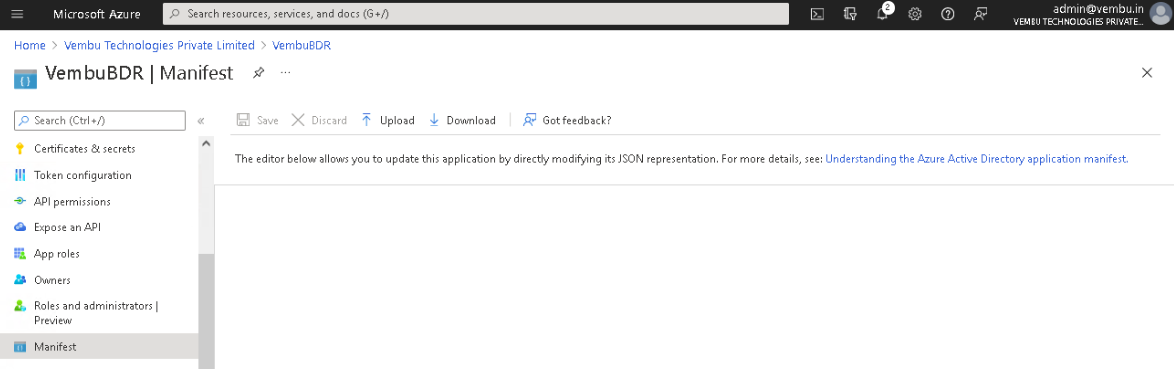 Search for the ‘requiredResourceAccess’ key in the JSON and replace the existing values with the exact content provided below;
API Permission Values
[
{
“resourceAppId”: “00000003-0000-0000-c000-000000000000”,
“resourceAccess”: [
{
“id”: “19dbc75e-c2e2-444c-a770-ec69d8559fc7”,
“type”: “Role”
},
{
“id”: “1bfefb4e-e0b5-418b-a88f-73c46d2cc8e9”,
“type”: “Role”
},
{
“id”: “18a4783c-866b-4cc7-a460-3d5e5662c884”,
“type”: “Role”
},
{
“id”: “06b708a9-e830-4db3-a914-8e69da51d44f”,
“type”: “Role”
}
]
}
]
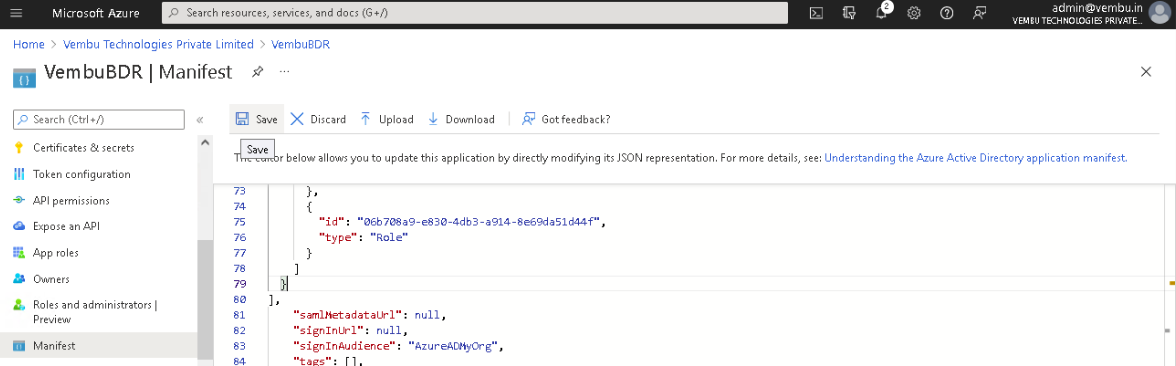
Note: API permission values will automatically enable all the API permissions required for backup.
After replacing the values, click the Save icon on top of the page.
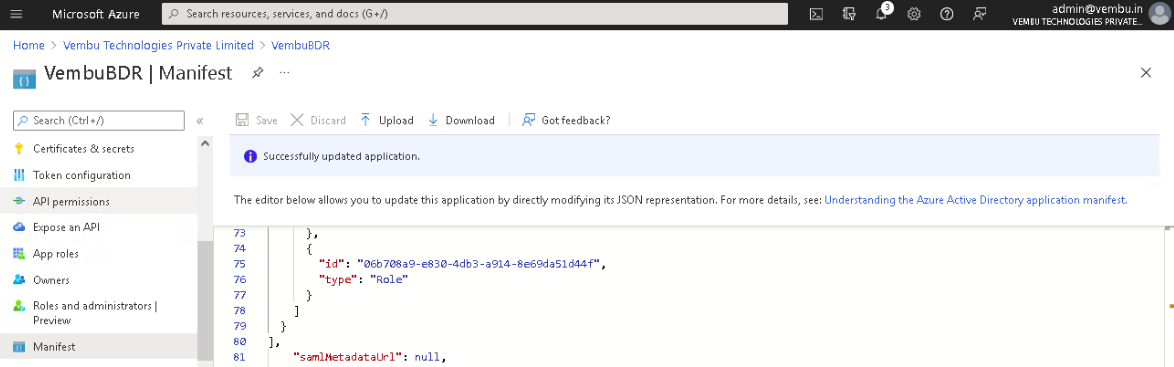
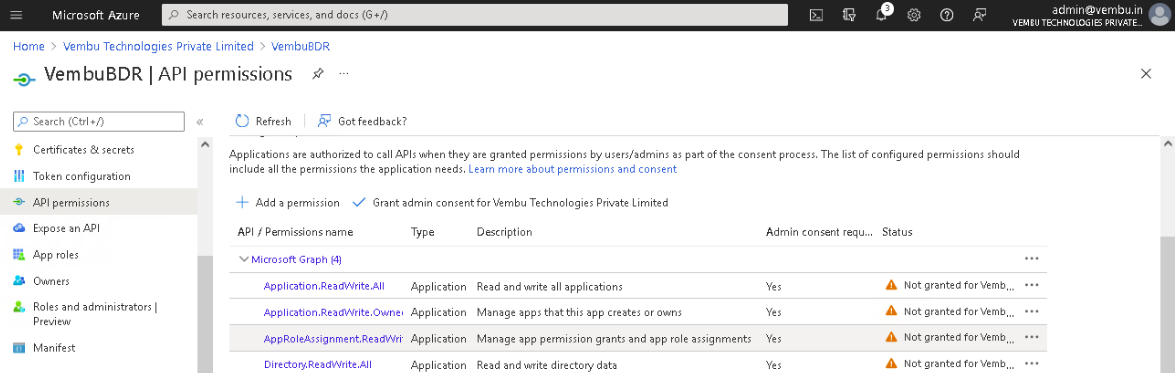
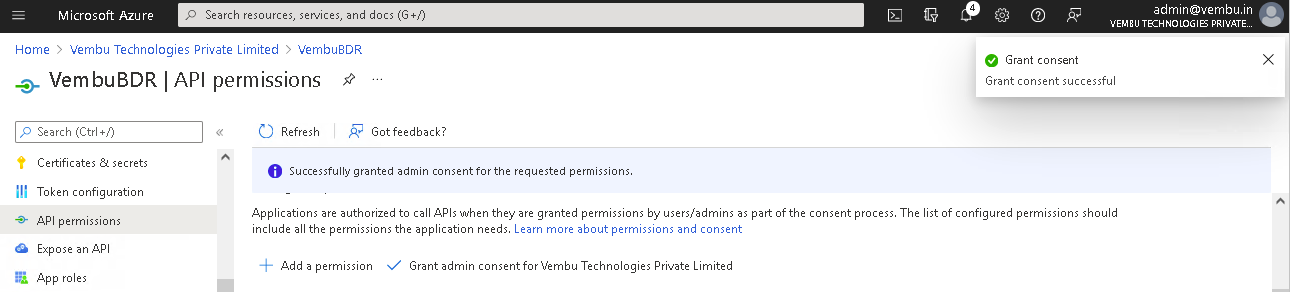
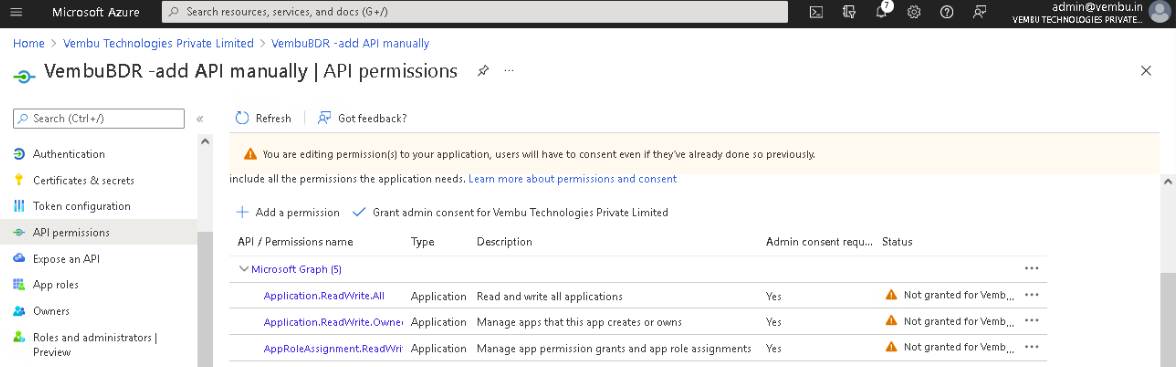
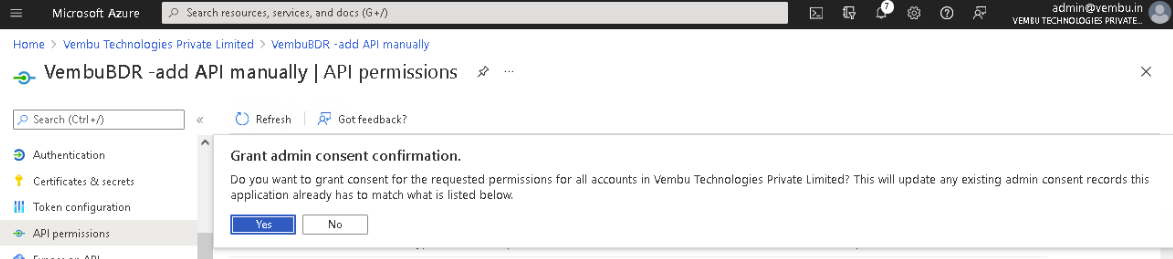
Finally, Select API Permissions under Manage on the left pane. Click the option – Grant admin consent for {your tenant} shown on the right side and click Yes to confirm the admin consent action.

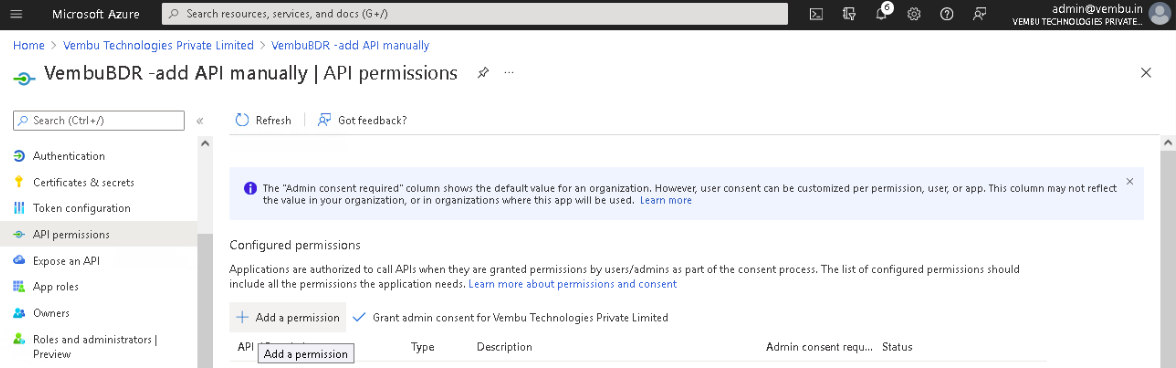
OPTION 2 – Add Permissions Individually
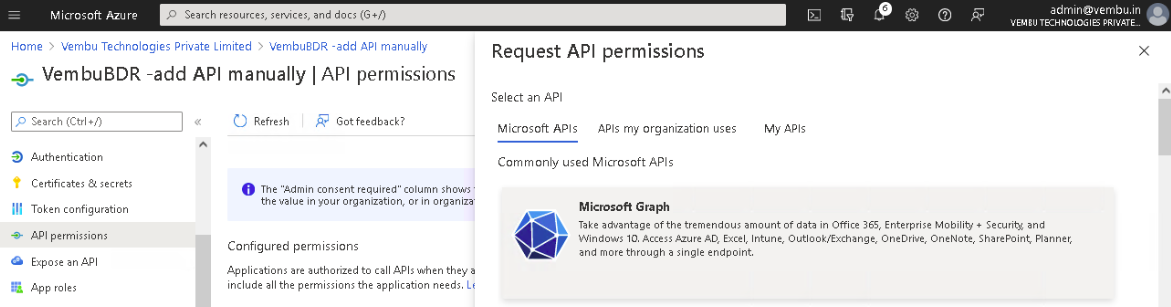
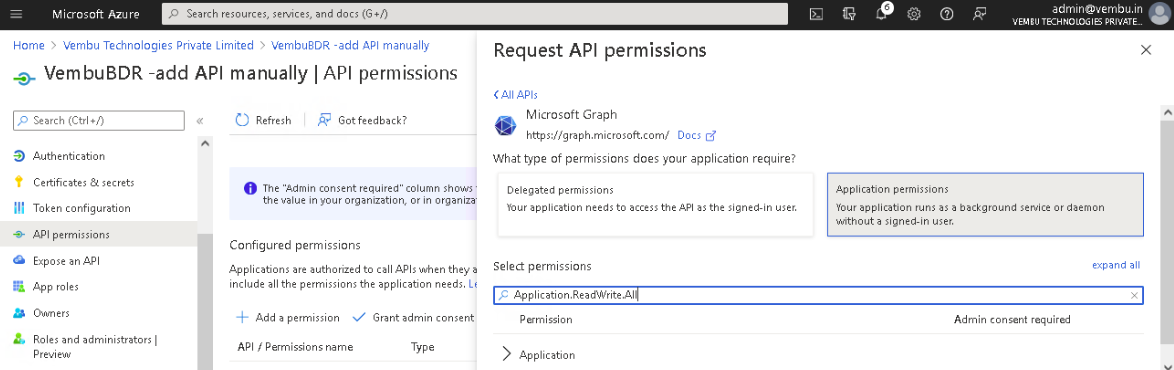
Select API Permissions under Manage on the left pane. On the API permissions page, click on Add a permission option which will open the Request API Permissions page.
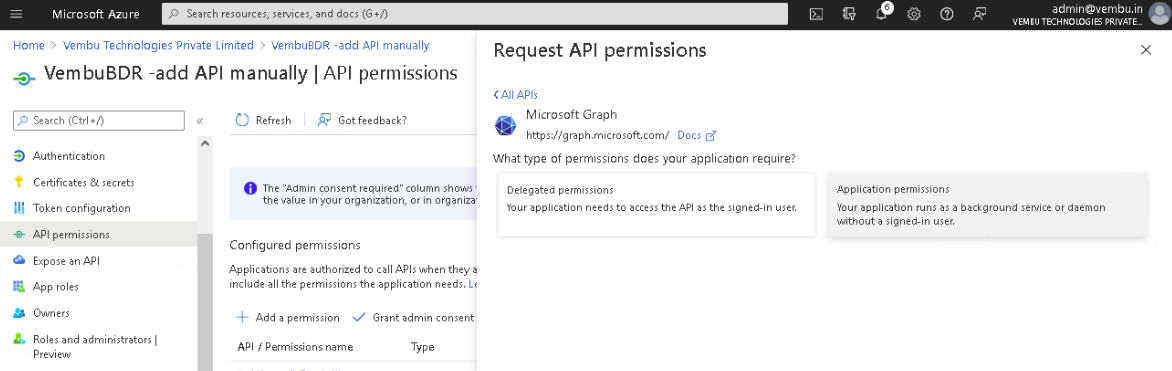
On the tab – Microsoft APIs, click on the Microsoft Graph option listed under commonly used Microsoft APIs.
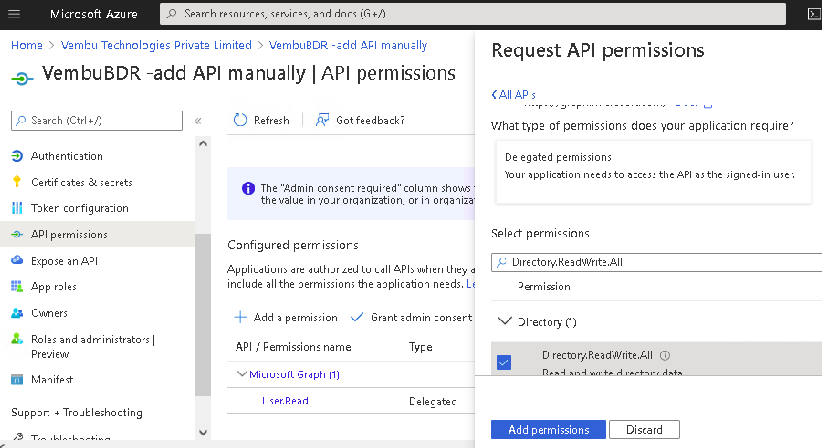
Select the Application permissions option and use the search bar to find the below-listed permissions and enable their checkbox.
-
- Application.ReadWrite.All
- Application.ReadWrite.OwnedBy
- AppRoleAssignment.ReadWrite.All
- Directory.ReadWrite.All
Note: These permissions will automatically enable the other API permissions required for backup.
Click on the Add Permissions button to complete the process.
Lastly, click on the Grant admin consent for {your tenant} option and click Yes to confirm the admin consent action.
Now, you have generated both Application ID and Application Password with all the required API Permissions enabled.